Backpack Size Guide
All adventures begin with a backpack. A properly fitted backpack makes all the difference on the trail, steep ascent, or exposed sky run. Your backpack should allow you to feel unhindered, and give your body the freedom of movement it deserves.
This guide is here to help you find the right backpack, with a perfect fit, for your next trip. We have broken down the backpack size guide into 3 easy steps.
Step One – Measure your back length
You will need a tape measure for this step. Got one in hand? Great.
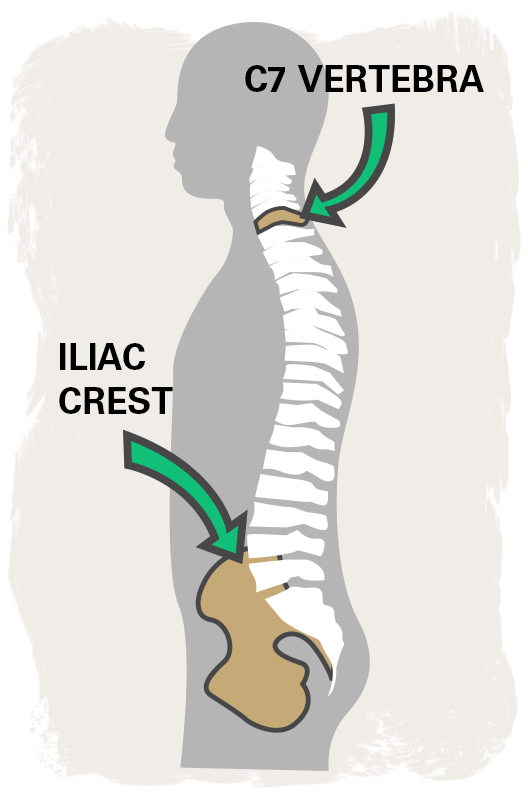
You can find your back length by measuring from your C7 vertebra, the bony bit at the back of your neck directly down parallel to your iliac crest. Tilt your head forward slightly to find your C7 vertebra, and place your hands on your hips. Your iliac crest is the most obvious pretruding part of your 'hip bone' and where you would naturally place your hands on your hips with your thumb and fingers spread and facing away from one another.
Step Two – Pick your pack
Choose your pack based on your activity of choice, using the filters on our category pages for Rab Packs and Lowe Alpine packs.
You will find the individual pack size information at the top of each product page. The measurements you have just taken can be used to choose a pack in the right size. Whether you need a pack for your next big mountain ski trip, or to accompany long weekends spent on the trail, we are sure to have the pack for you.
Adjustable Back Length Sizes Explained
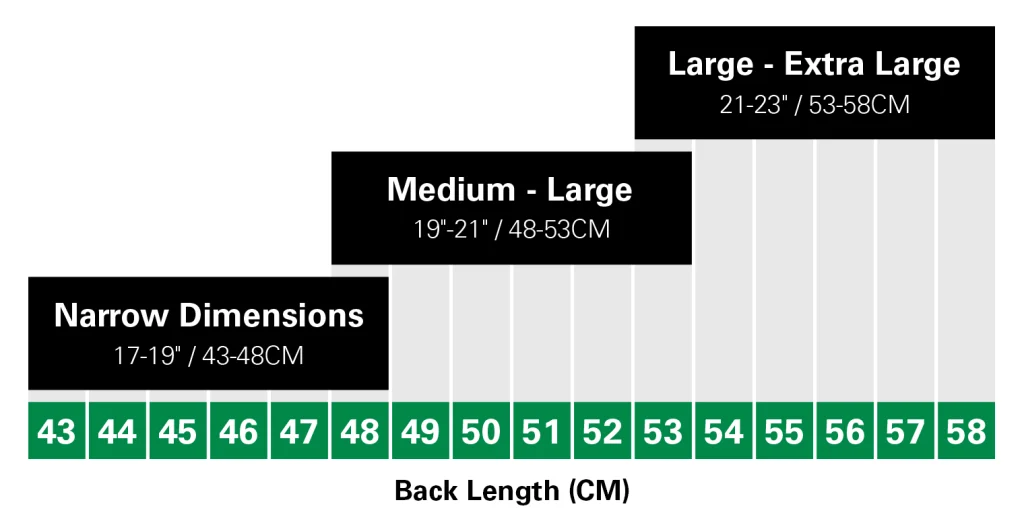
We make packs to fit your unique body shape, while also being suited to your activity of choice. Our adjustable back lengths follow a standard size. The product sizes are also shown on the product pages.
Our ND Packs Explained
You may have noticed some of our packs have the words ND in the name.
Our ND Narrow Dimensions packs are built with different proportions to our Regular packs, making them ideally suited to anyone with a smaller frame. They’re designed to provide a comfortable and supportive fit for women or men with a narrower build.
Step Three – Fit your new pack
The mail has arrived, and with it, your new pack. It’s time to get your pack fitted, and ready for your next trip.
Hold on. Before you get excited we just want to introduce you to some key components of your pack. Your backpack’s back system is made up of 4 main parts. These are:
4. Load lifter strap
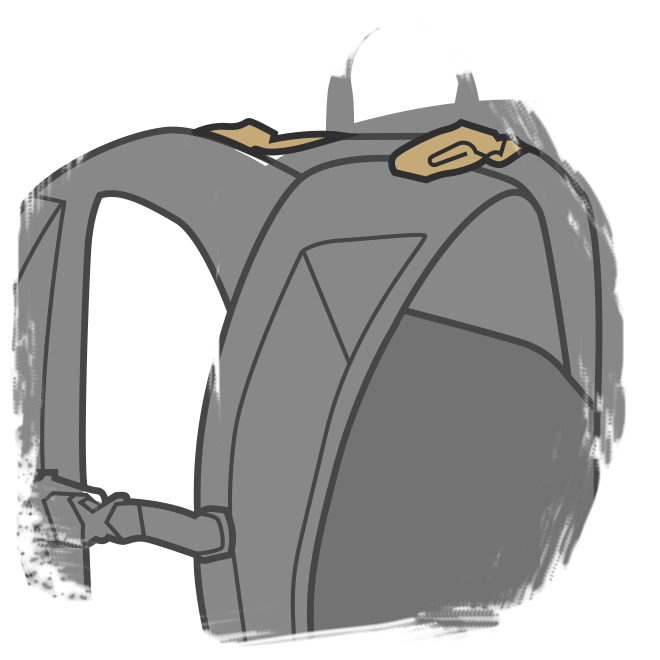
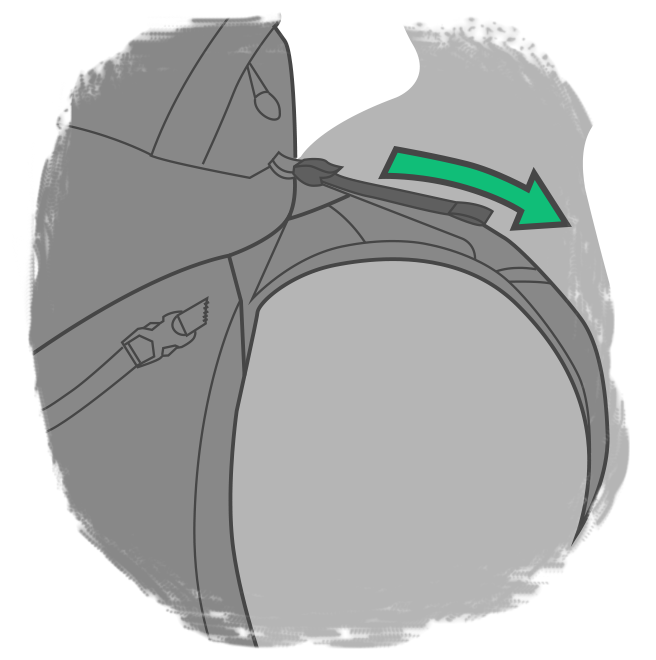
The load lifter strap is the small strap that connects the top of the shoulders to the upper construction of the back system on your pack. If you loosen the straps, the top of the pack will move away from your body, and if you tighten them, the top of your pack will shift towards your body.
This helps to centre the weight of your pack towards your body which is useful if you have a lot of weight at the top of your pack.
3. Chest strap
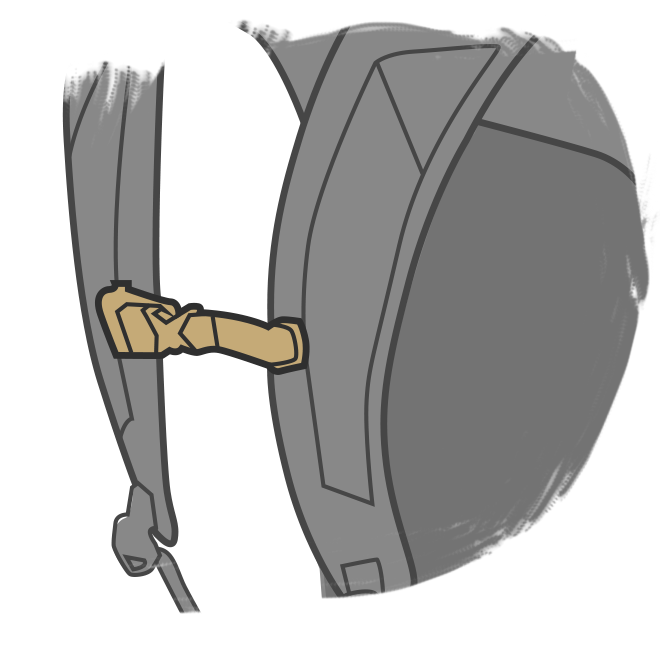
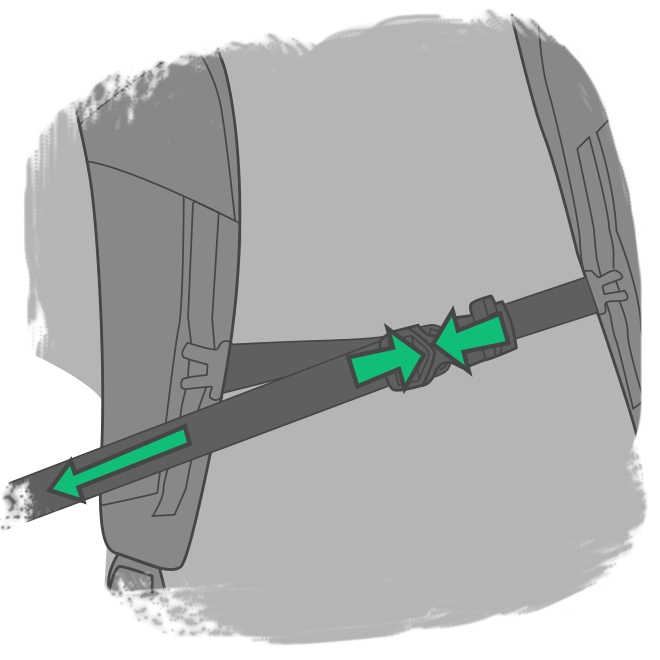
The chest strap, or sternum strap, is simply designed to stop your shoulder straps from sliding down your arms. This is particularly helpful when wearing softer garments, such as shells, where there isn’t much friction to hold the shoulder straps in place.
The sternum straps should be tightened enough to achieve this, but it should not restrict your breathing or range of movement.
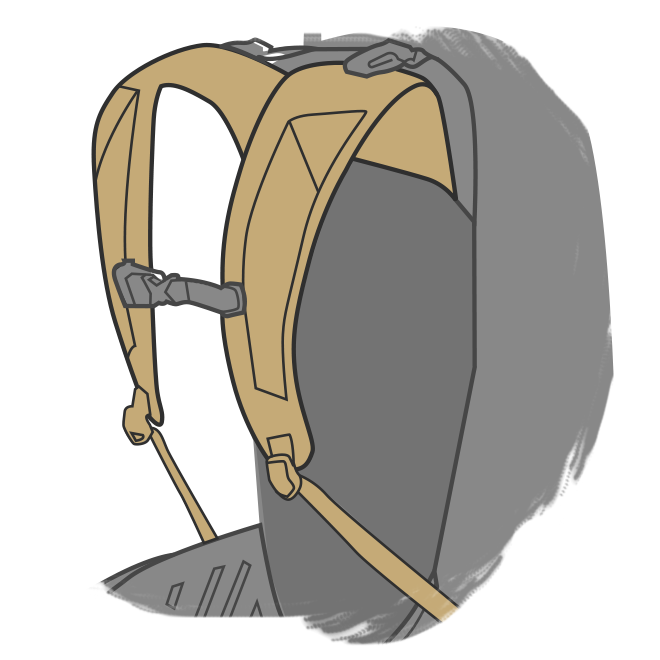
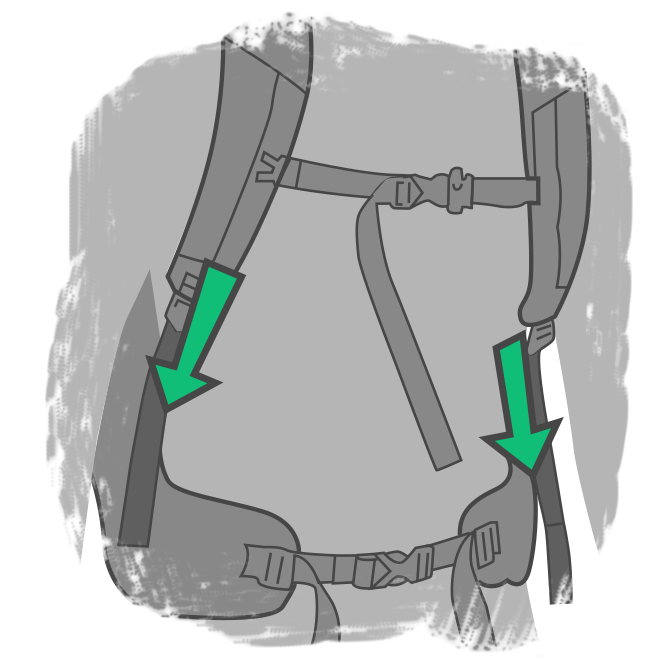
The shoulder straps are designed to fit snug to your shoulders, and the front of your upper torso, without restricting movement or blood flow. They should follow your natural shape and be secure enough to stop the pack bouncing around when moving, but loose enough to ensure you have a free range of movement.
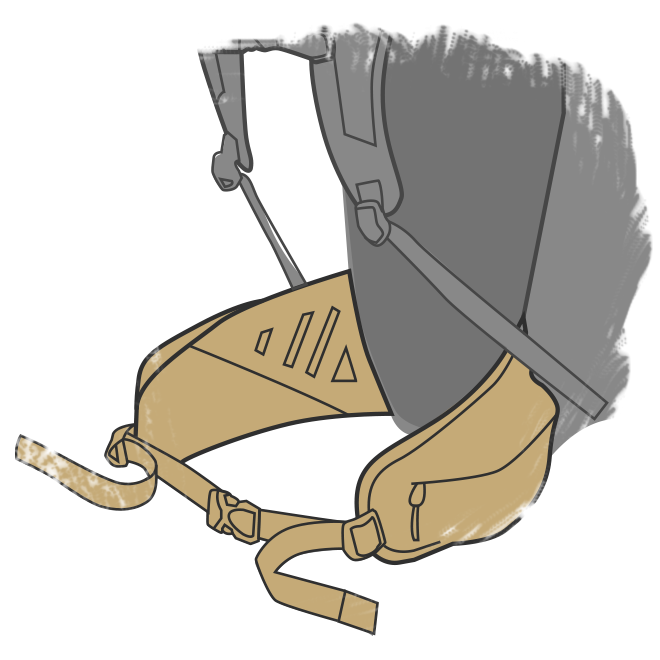
1. Hip belt
The hip belt is designed to securely fasten around your hips. A common mistake is to put the weight of the backpack on your shoulders and use the hip strap for stabilisation. In fact, it works the other way around. The hips need to take your weight and the shoulder straps are for stabilisation.
Fitting your backpack for a comfortable fit involves adjusting all four parts. Here is how you do it.

Step 4.
Start with the waist strap, securing it so the top of the hip belt sits about 1” above your iliac crest.
Step 3.
Loosen all of the straps described above and put the rucksack on over your shoulders.
Step 2
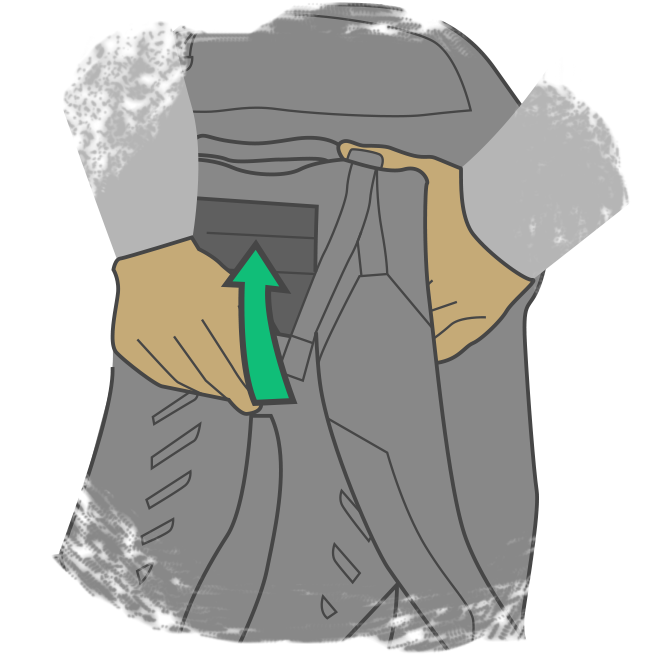
Adjust the back length using the mechanism provided. Measure the pack from the base to the middle of the shoulder straps. This should approximately match your back length measurement. However there willl be some tolerance to consider.
Step 1
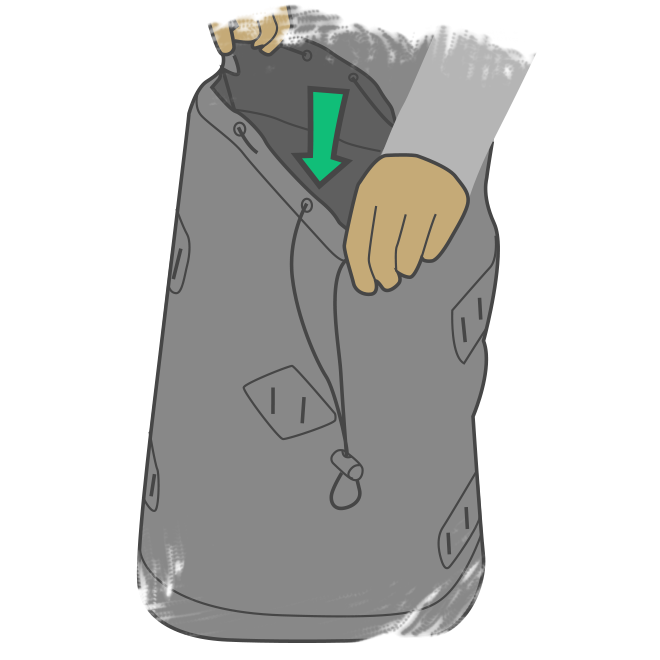
Load up your backpack with as much weight as you expect to carry for your trip. This way, you will ensure your pack is fitted with load and there are no surprises on the trail.
Step 8.
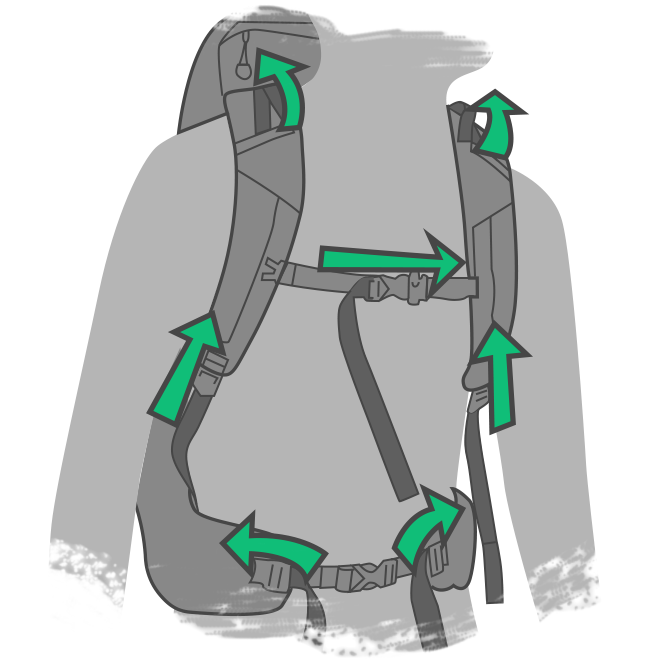
Finally, attach the sternum strap, and gently pull it in.
Step 7.
Gently adjust the load lifter strap to bring the pack weight into your back. Stop pulling before you feel the weight lift off your hips. This feature is especially useful if you have a heavy load and want to pull some of the weight into your centre of balance.
Step 6.
Now pull the webbing on the shoulder strap to bring the backpack up, and in towards your back. The shoulder straps should feel tight enough to hold the pack in place without any movement, but they shouldn’t restrict your movement.
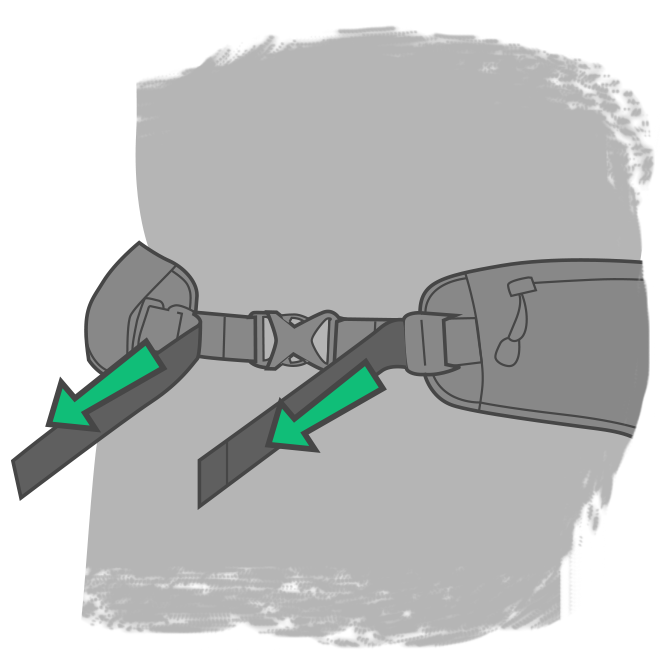
Step 5.
Pull the waist strap to adjust it, until you feel the weight of the pack rest on your hips. The fit should be snug but not too tight, and supporting all of the weight of the pack without sliding down.

